
Bold. Modern. Textured.
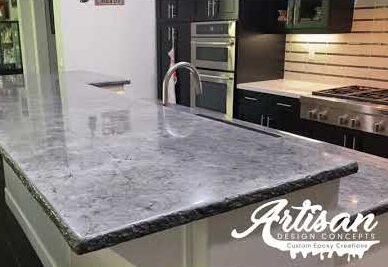
In this tutorial, we’re showing you how we created a hammered metallic silver epoxy countertop with a chiseled rock edge that gives off major industrial-meets-elegant vibes. If you love high contrast and statement surfaces, this design is for you.
From building the form to the final finish, we cover every step of the process—including how we achieved that realistic rock edge texture and gave the surface its sleek, metallic shine.
What You’ll Learn
- Form Building – how to prep and frame your pour with a rock edge design
- Hammered Texture Finish – using technique and metallic pigments to mimic a hammered metal effect
- Rock Edge Detailing – tips for sculpting realistic, organic countertop edges
- Metallic Pour Technique – how to control the flow and shimmer of metallic epoxy
- Final Finishing – sanding, sealing, and refining the edge and surface for a professional result
Why It’s Worth Watching
- Unique Textures – great for those who want a non-traditional countertop look
- Edge Inspiration – see what’s possible beyond standard square or rounded edges
- Shimmer & Depth – metallic epoxy creates light play and visual movement that stone can’t replicate
Pro Tips from the Video
- Use metallic pigments sparingly—a little goes a long way for dramatic effect
- Shape the rock edge before pouring to maintain control over the final texture
- Layer and blend colors to enhance depth and avoid flat silver finishes